Creating a Custom List using Visual studio 2012:
In this exercise, you will work through the basics of creating, testing and debugging a custom list type using the new list designer in Visual Studio 2012.
Download: https://sites.google.com/site/sasivalipireddy/home/Create custom list using VS2012.pdf
Download: https://sites.google.com/site/sasivalipireddy/home/Create custom list using VS2012.pdf
1. Launch Visual Studio 2012.
2. Create a new SharePoint 2013 – Empty Project and name this new projectCustomListSolution. Click OK on the New Project dialog.

3. In the SharePoint Customization Wizard, add the URL of the site created earlier and ensure that the option to Deploy as a sandboxed solution is selected. Click Finish.

4. At this point you should have created a new SharePoint project that you can test by deploying it as a sandboxed solution.

5. Right-click on the CustomListSolution project in the Project Explorer and click the Add > New Itemcommand.
6. Create a new project item from the Site Column item template named MemberType.

7. When you create a new site column, Visual Studio creates on a node inside your project which contains an elements.xml file with a Field element to provide you with a starting point for a new site column definition. This starting point includes a new GUID for the ID. Modify the Field element for your new site column as shown below to create a choice column with four choices. Note that you can use the GUID that is created and that you do not have to change the GUID to match the one below.
<Field
ID="{dfa867d2-79d0-496d-b379-d35b181a0c06}"
Name="MemberType"
DisplayName="Member Type"
Type="Choice"
Required="True"
Group="Contoso Site Columns">
<CHOICES>
<CHOICE>Full-time Employee</CHOICE>
<CHOICE>Part-time Employee</CHOICE>
<CHOICE>Intern</CHOICE>
<CHOICE>Contractor</CHOICE>
</CHOICES>
</Field>
|
9. Note that creation of the Site Column should have also create a new feature that has been namedFeature1. Right-click and the feature in the Solution Explorer and click the Rename command to rename the feature to MainSite.

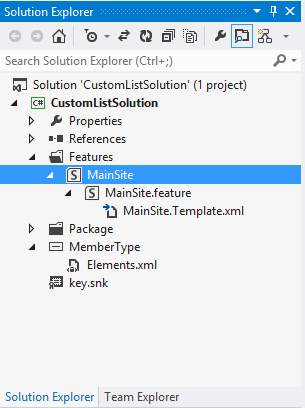
10. Double click the MainSite feature to display it inside the Feature Designer. Update the feature so it activates at the site collection level by changing the Scope property to a value of Site. Also modify the Title property of feature from its default value to Custom Members List make it look more readable.


11. Right-click on the CustomListSolution project in the Project Explorer and click the Add > New Item command. Create a new item from the List template named TeamMembers. Click the Addbutton to move to the next step.


12. On the SharePoint Customization Wizard, Add a display name of Team Members. Also ensure you select the option for Customize the list based on: Default (Blank). Click Finish to see the new customizable list in the new List Designer.


13. In the List Designer, navigate to the List tab. Change the Title to Team Members. Ensure the list URL is Lists/TeamMembers (without a space). Also add a simple description.


14. In the List Designer, navigate to the Columns tab. You should see the list has an initial set of columns that just includes the standard Title site column.


15. Make sure you have the Title column selected in the List Designer. Now inspect that column in the standard Visual Studio property sheet. You should be able to see it displays the properties for theTitle site column. Update the Display Name property to Last Name.


16. Now return to the List Designer and add four more site columns including First Name, Business Phone, Home Phone and Member Type. Note that the first three are standard site columns that are included as part of SharePoint Foundation. The fourth site column named Member Type is the custom site column you create earlier in this lab exercise. Be sure to configure each of these site columns so that they are required.
 17. In this step you need to add two more site columns named LinkTitle and LinkTitleNoMenu. However, these cannot be added using the List Designer. Instead, you must make a direct edit to theschema.xml file for the custom list. Open the schema.xml file and locate the element for the Fieldscollection. You should see that the first Field element in the Fields collection is the site column with the name of Title.

<List>
<MetaData>
<ContentTypes> ... </ContentTypes>
<Fields>
<Field Name="Title" ...
|
18. Inside schema.xml, add a line break directly after the Field element which defines the Title site column. Add the following Field elements to add the site columns LinkTitle and LinkTitleNoMenu and to configure both of them with a Display Name of Last Name. If you would rather not type all this in, you can copy and paste the XML code from the file inside the folder for this lab namedAddSiteColumns.txt.
<Field
ID="{82642ec8-ef9b-478f-acf9-31f7d45fbc31}" Name="LinkTitle" DisplayName="Last Name" Type="Computed" /> <Field ID="{bc91a437-52e7-49e1-8c4e-4698904b2b6d}" Name="LinkTitleNoMenu" DisplayName="Last Name" Type="Computed" /> |

20. In the List Designer, navigate to the Views tab. You should see there is a single view which is named All Items. From the Selected columns list below, ensure the site column named Attachmentsdoes not appear in the Selected columns list.


21. Double-click the MainSite feature and make sure the MemberType, TeamMembersInstance, and TeamMembers items are included in the feature.
 22. Now it is time to deploy the solution and test your work. Rick-click on the top-level project node inside the Solution Explorer and click the Deploy command. This should build the project into a .WSP file and then upload the .wsp file to the target site collection for your test site. After that, Visual Studio will activate the sandboxed solution which should activate the MainSite feature and create a new instance of your custom list. Go to the Internet Explorer and refresh the page showing the test site and verify you can see a link to the Team Members list.


23. Click on the link to the Team Members list and see what it looks like. Add one or two new items to the list to test the user experience of your custom list.


24. Note that each time you run the Deploy with your project, Visual Studio will delete the existing list instance and create a new one. Therefore any content you add will be deleted during your testing. Therefore, you might want to add some default content to your custom list. You will accomplish this over the next few steps
25. Inside the node for the custom list type named TeamMembers, locate the child node namedTeamMembersInstance which contains a file named elements.xml.


26. Open the elements.xml file from inside the TeamMembersInstance node and inspect theListInstance element inside.
<Elements xmlns="http://schemas.microsoft.com/sharepoint/">
<ListInstance Title="Team Members" ... >
<!-- add XML here to add default items -->
</ListInstance>
</Elements>
|
27. You can add a default item to the list with the following code. If you would rather not type in all this XML, you can alternatively copy and paste the contents of the text file namedDefaultMemberItems.txt inside the ListInstance element to create several new Members each time the list is recreated.
<ListInstance Title="Team Members" ... >
<Data>
<Rows>
<Row>
<Field Name="Title">Healy</Field>
<Field Name="FirstName">Joe</Field>
<Field Name="WorkPhone">(800)EAT-FISH</Field>
<Field Name="HomePhone">(813)111-2222</Field>
<Field Name="MemberType">Full-time Employee</Field>
</Row>
</Rows>
</Data>
</ListInstance>
|
28. Test your work. You should be able to deploy your project from Visual Studio and then refresh the page with the Team Members in the Internet Explorer and see you default items.

29. Return to the Views tab in the List Designer. Create a new view named Phone List. Create the new view to include Last Name, First Name and Business Phone and Home Phone. Save your work when you are done. Make this view read-only so that users cannot make changes to this view.


30. The next step will involve adding custom sorting behavior which will require making a manual edit to the schema.xml file. Open schema.xml in code view and find the View element for the Phone List view. Add an OrderBy clause to sort by the Title column which will have the effect of sorting by the member’s last names.
<View BaseViewID="2" Name="ee64ba2b-80ef-4bba-a850-753c6220d48b"
DisplayName="Phone List" Type="HTML" ReadOnly="TRUE"
WebPartZoneID="Main" Url="Phone List.aspx">
DisplayName="Phone List" Type="HTML" ReadOnly="TRUE"
WebPartZoneID="Main" Url="Phone List.aspx">
<RowLimit>50</RowLimit>
<ViewFields>
<FieldRef Name="Title" />
<FieldRef Name="FirstName" />
<FieldRef Name="WorkPhone" />
<FieldRef Name="HomePhone" />
</ViewFields>
<Query>
<OrderBy>
<FieldRef Name="Title"/>
</OrderBy>
</Query>
<Toolbar Type="Standard" />
<XslLink Default="TRUE">main.xsl</XslLink>
</View>
31. Test your work. You should be able to deploy your project from Visual Studio and then refresh the page with the Team Members in the Internet Explorer. Change the view from All Items to Phone List. You should be able to see that the view has the correct set of columns and the correct sorting.
 Enjoy coding..

Comments