Uploading files to SharePoint document library from Power Apps just got easier! Attaching files in Power Apps and saving to them SharePoint is a common requirement for many apps so its an important skill to learn. To do this we will use the new Power Apps (V2) trigger in Power Automate which includes the file data type as an input It is no longer necessary to perform a complicated series of steps to transform a file to binary using the JSON function and then back to Base64 (not exactly low-code).
In this article I will show you the easiest way to upload files to a SharePoint document library in Power Apps and add metadata (i.e. tags) to the file.
Table of Contents:
Introduction: The Submit A Contract App
Setup The SharePoint Document Library
Insert An Attachments Field
Make A Flow To Upload Documents To A SharePoint Library
Connect The 'Upload To SharePoint' Flow In Power Apps
Upload Multiple Files To A SharePoint Document Library
Add Metadata To A SharePoint Document Library
Display Recently Uploaded Files
Introduction: The Submit A Contract App
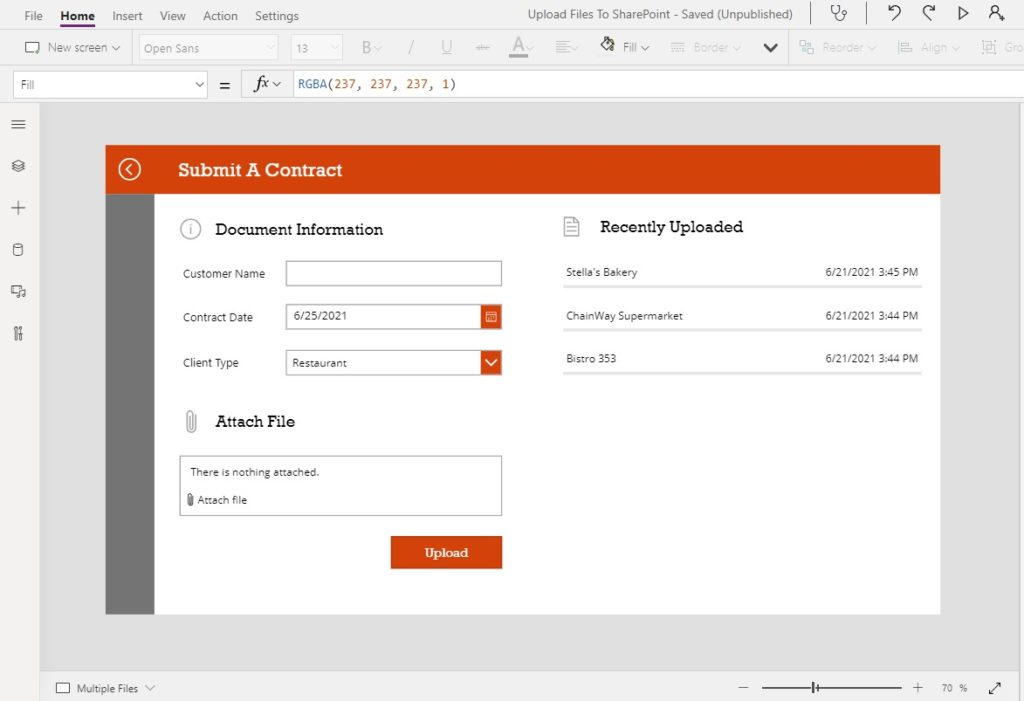
The Submit A Contract app is used by salespeople at a bakery to upload contract files to a SharePoint document library. Once a contract is signed the salesperson attaches the file, adds some metadata (customer name, contract date and customer type) to help keep the contracts organized and presses the upload button to submit the file
Setup The SharePoint Document Library
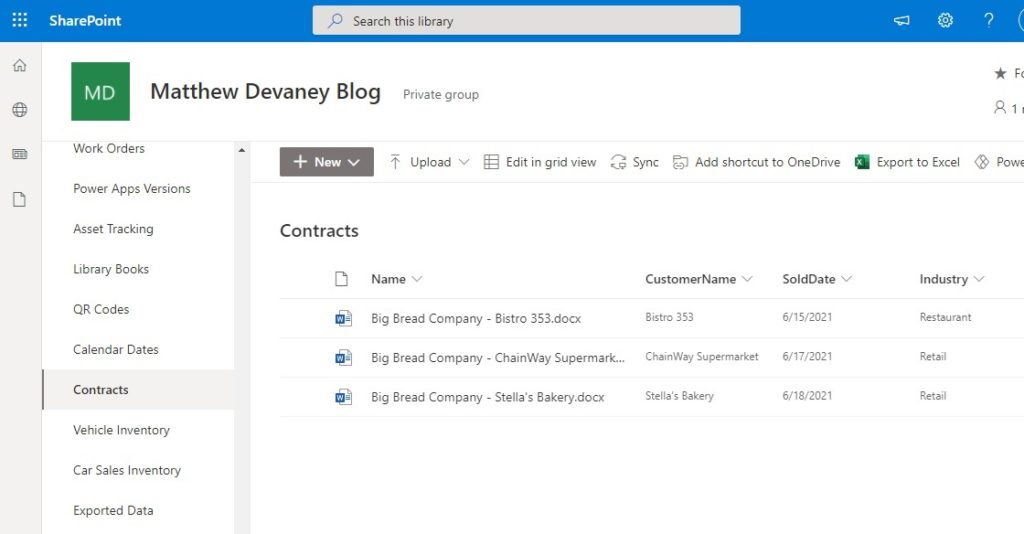
Add a new SharePoint document library called Contracts with the following columns and types:
- Name (single-line text)
- CustomerName (single-line text)
- SoldDate (Date only)
- Industry (single-line text)
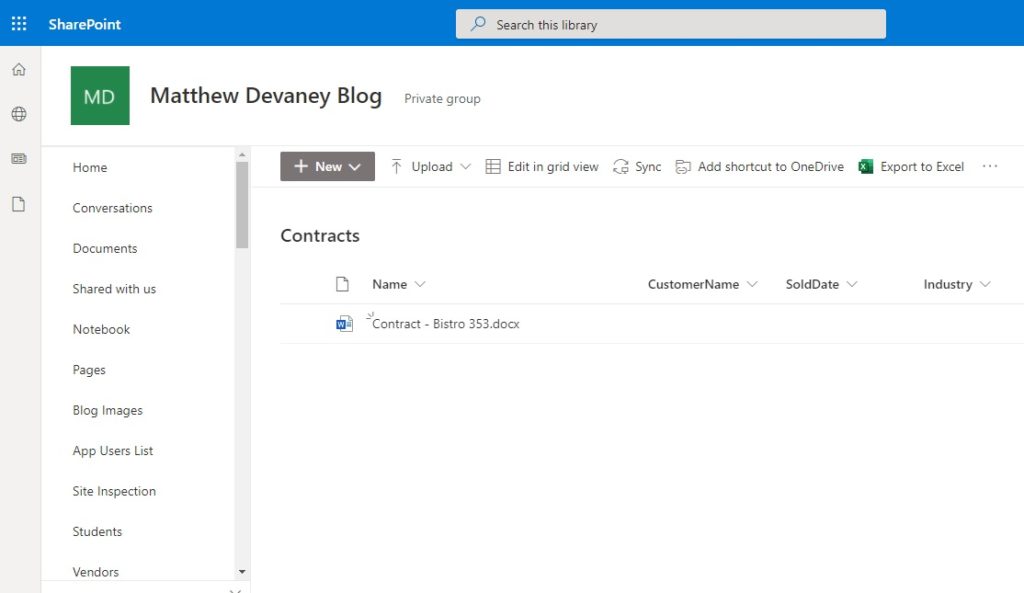
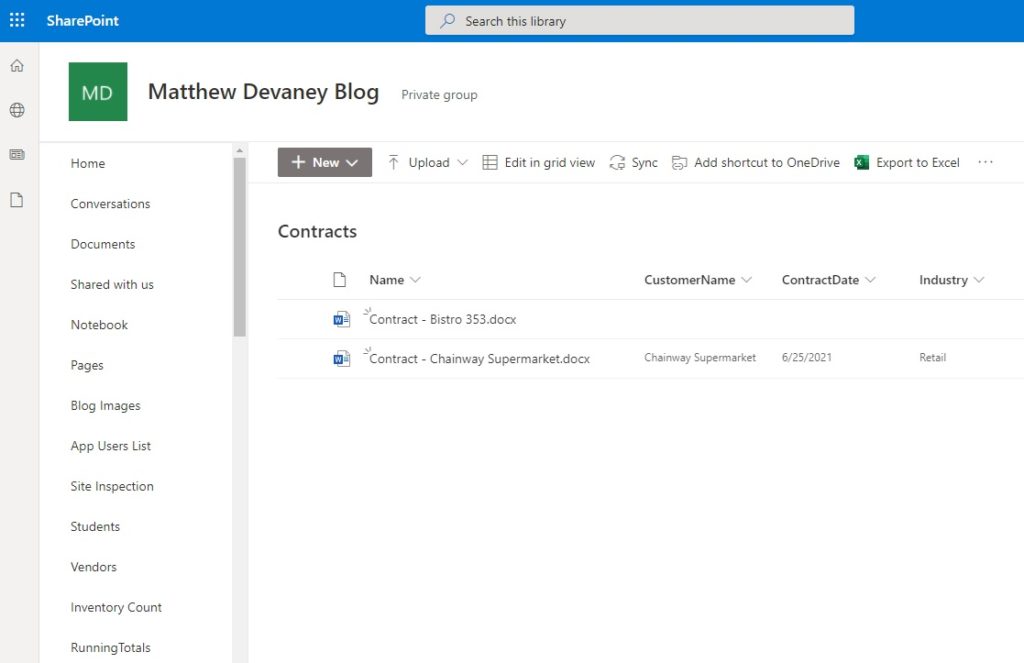
The document library will look like this once we upload some files later in the tutorial.
Insert An Attachments Field
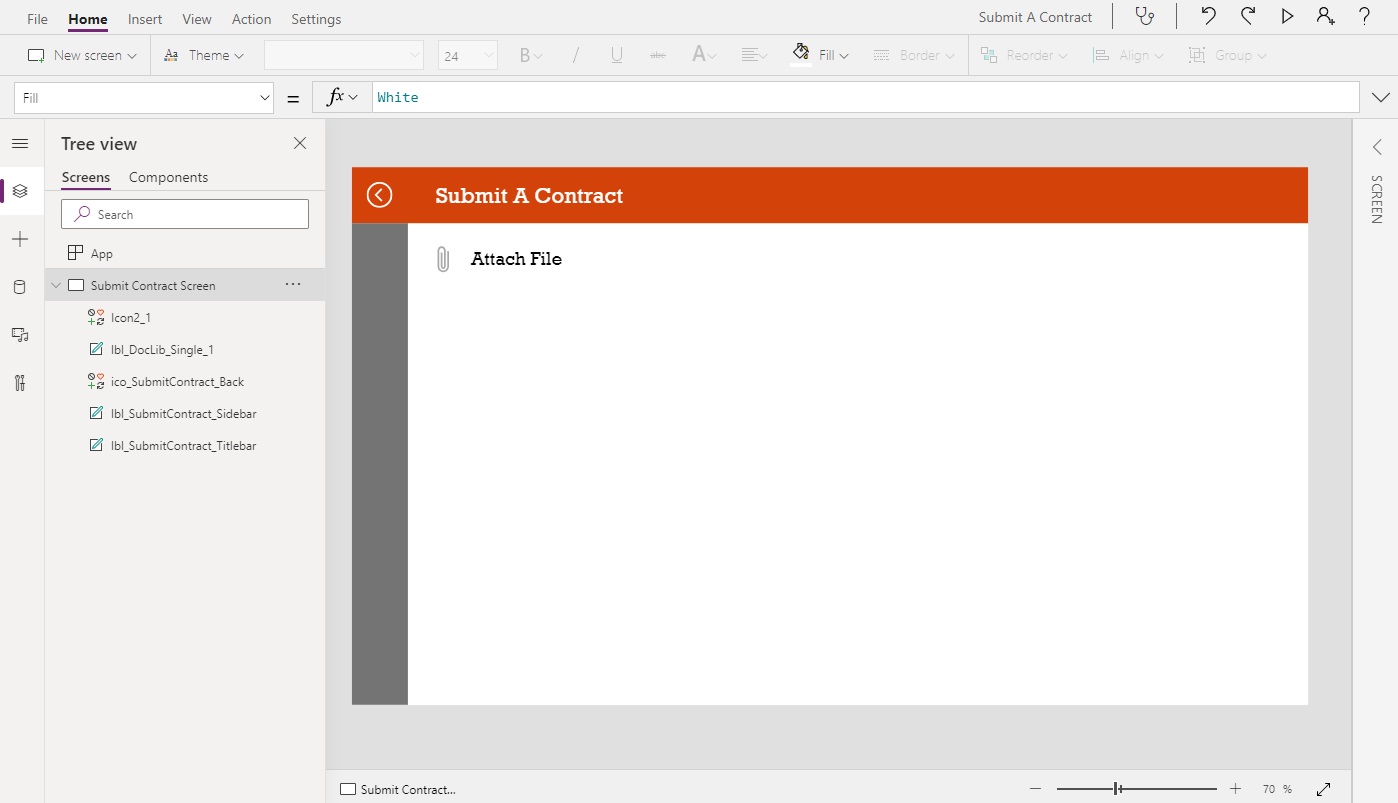
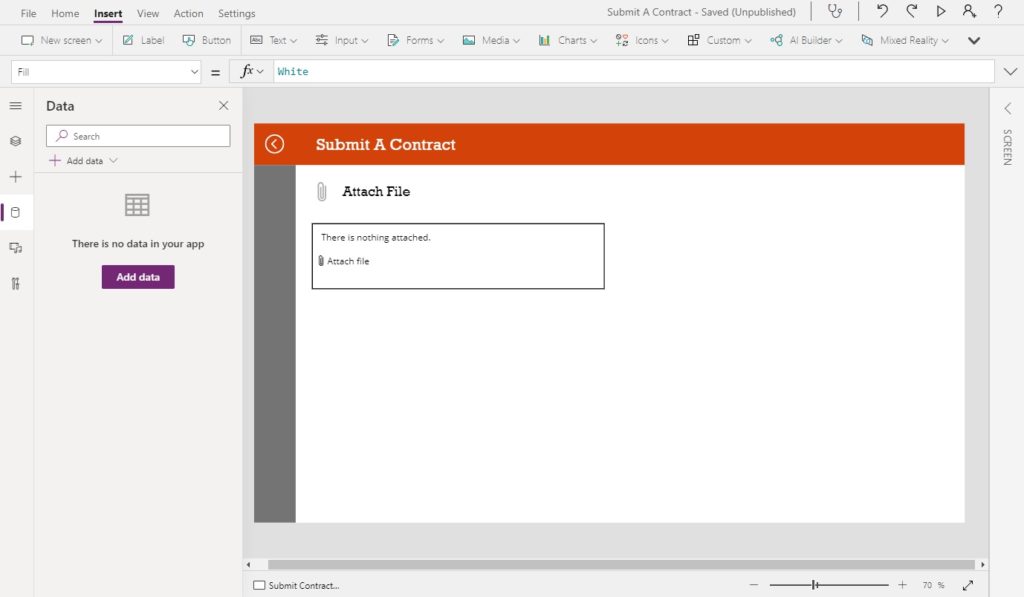
In the Submit A Contract app a salesperson needs to add a file to an attachments field and upload it to SharePoint. Open Power Apps and Create a new app from blank. Then insert a few labels and icons to make it look like the screenshot below.
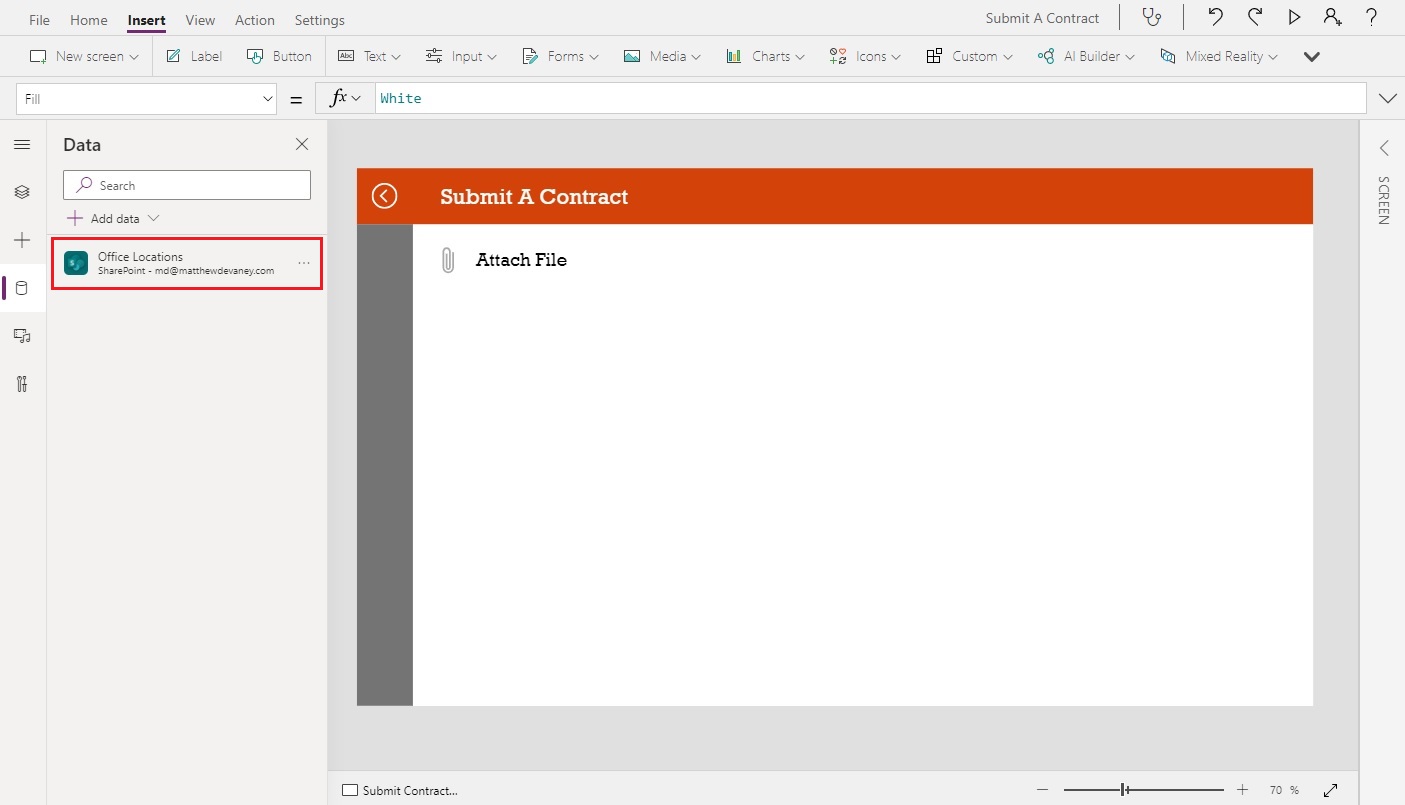
The attachments field cannot be inserted from the menu so we must use a workaround. Go to the data tab on the left menu and add any existing SharePoint list from your SharePoint site. Do not add the Contracts SharePoint document library we created earlier. We cannot use it to generate an attachments field.
Create a new Edit Form with your SharePoint list as the data source. The attachments control should automatically appear when we create the form. If it does not, you can add the attachments field using Edit fields on the right-side menu.
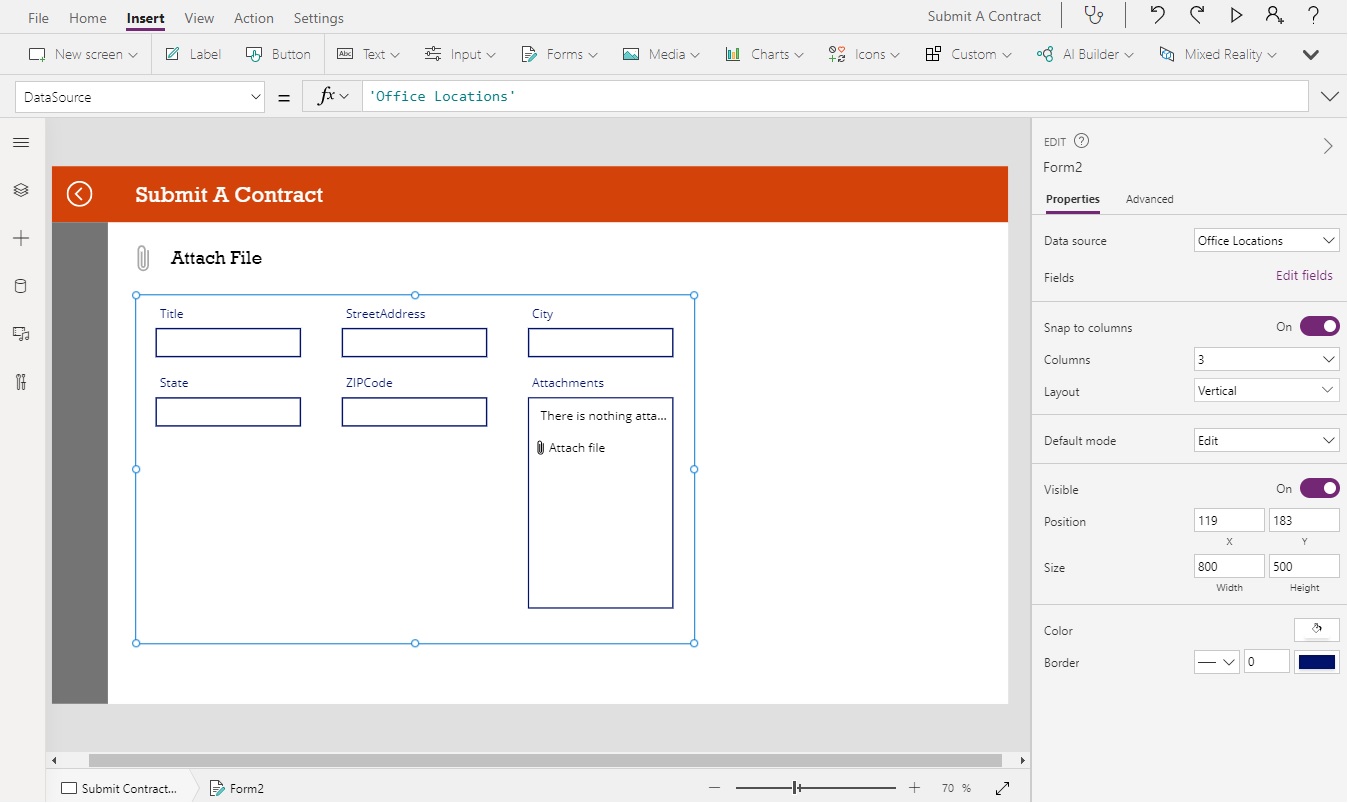
Cut the attachments control and paste it outside the form. Delete the form.

Use the following properties in the attachments control:
Items: Blank()
DisplayMode: DisplayMode.Edit
MaxAttachments: 1
Our app now has an attachments field we can use to upload the contract documents. We can now delete connection to the SharePoint list. It is no longer needed.
Make A Flow To Upload Documents To A SharePoint Library
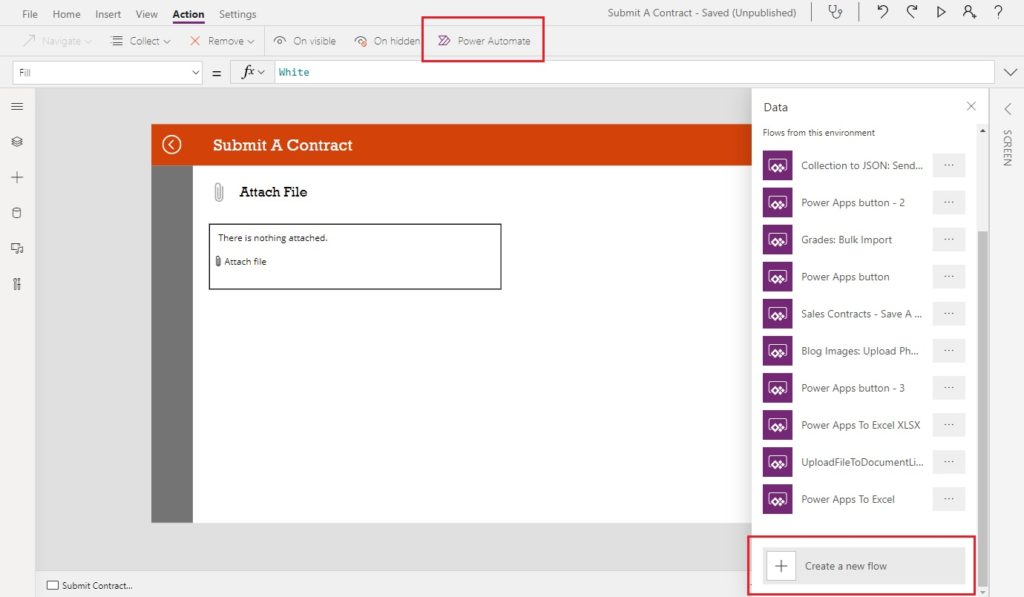
Documents cannot be uploaded to a SharePoint document library directly from Power Apps. We will need to create a Power Automate flow to do it instead. Open the Power Automate action from the top menu and select Create a new flow.
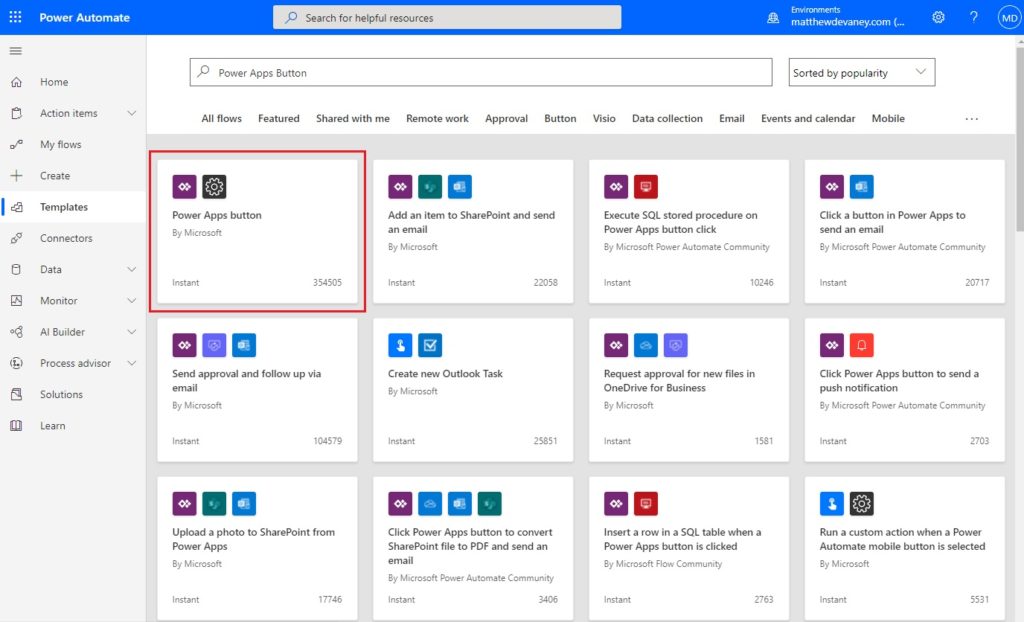
Choose the Power Apps button template.
Name the flow UploadFileToDocument library and click Save.
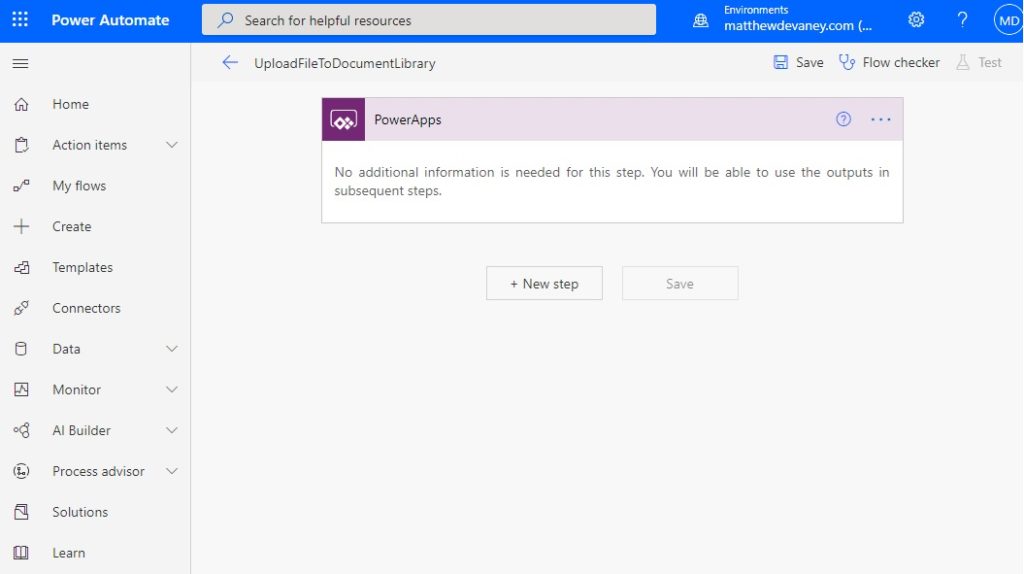
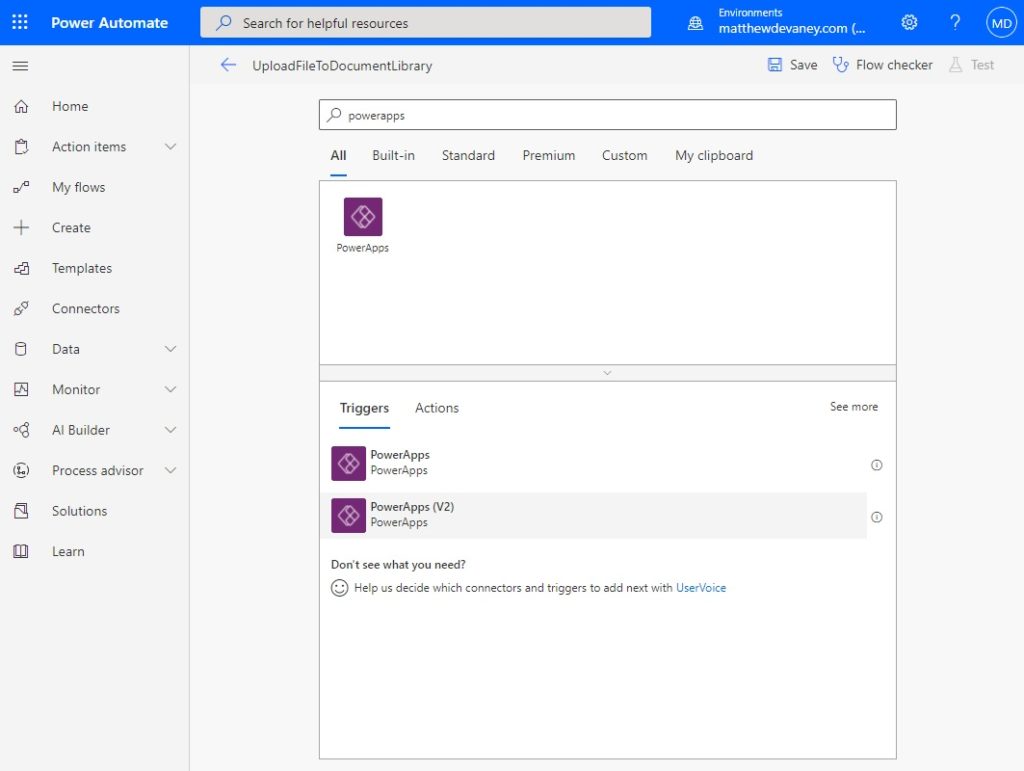
We want to use the PowerApps (V2) trigger because it supports files as an input type whereas the PowerApps trigger does not. Delete the PowerApps trigger and add PowerApps(V2) in its place.
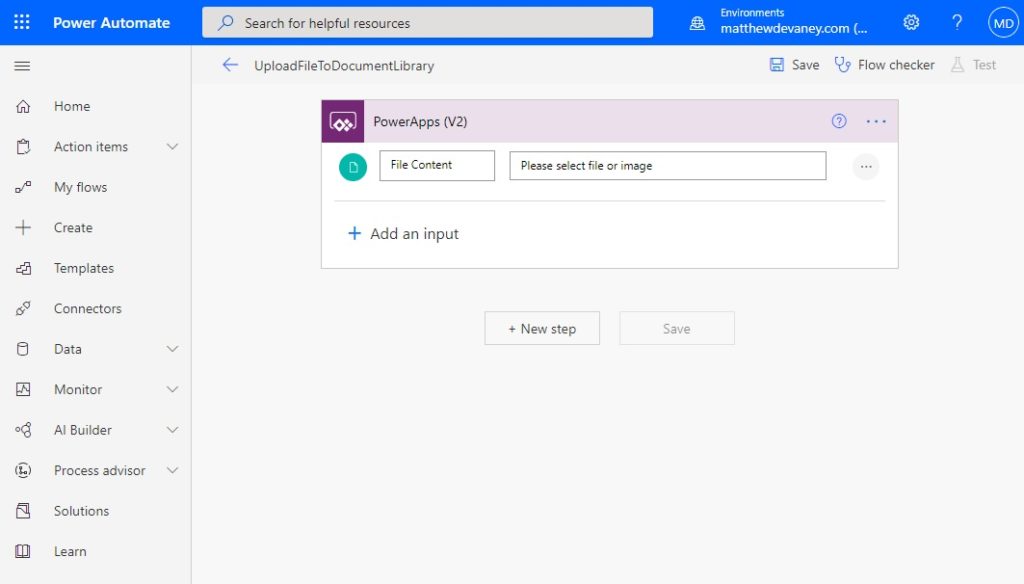
Select the File input type. Name the input File Content. Make File Content a required input.
Add a SharePoint action to the flow: Create File. Use your SharePoint site address and document library folder path as inputs. The File Content field should reference the file found in our flow trigger.
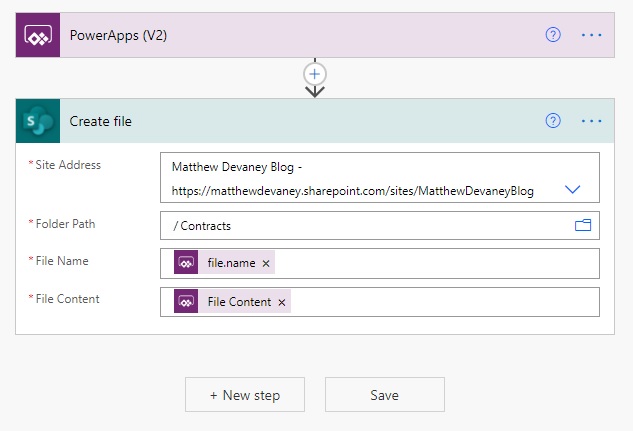
File Name requires a flow expression. Open the flow expression editor then copy + paste this code into the File Name field.
triggerBody()['file']['name']
We are now done creating the flow to upload a document.
Connect The ‘Upload To SharePoint’ Flow In Power Apps
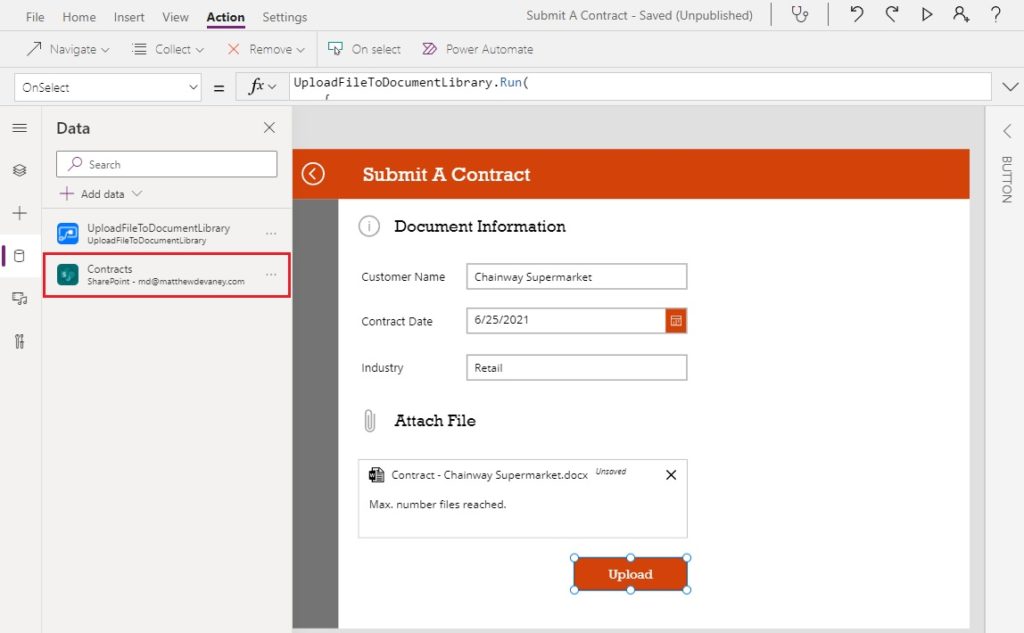
Go back to PowerApps and add a button. Select the OnSelect property and click on the UploadFileToDocumentLibrary field in the Power Automate menu.
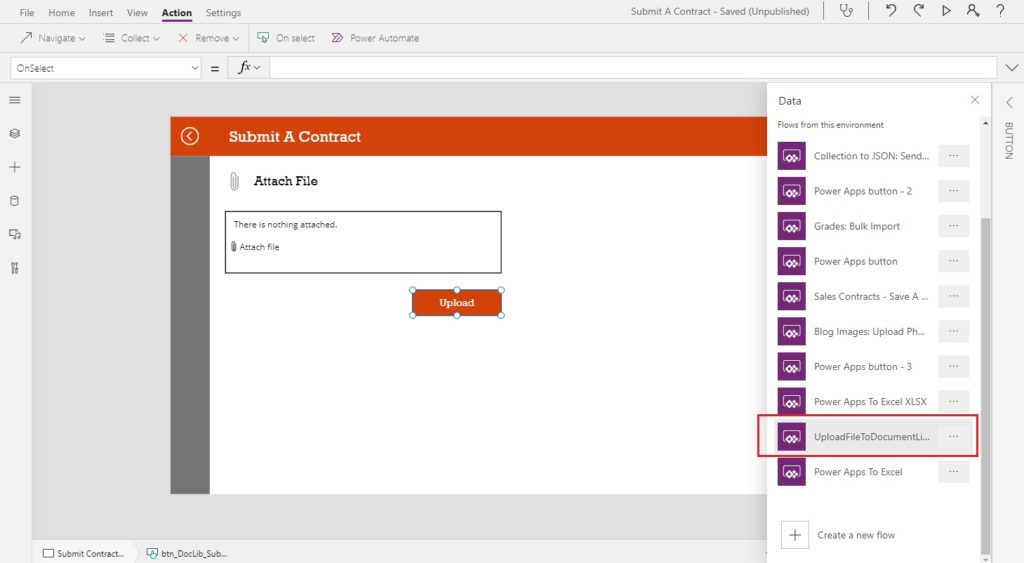
The flow will appear as a connection in the data tab.
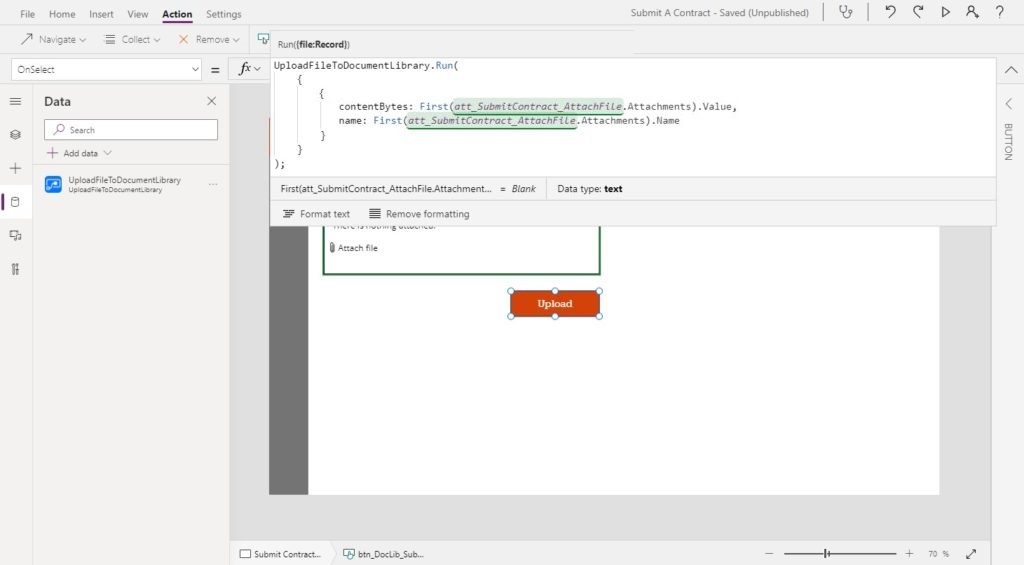
Remove any code from the Upload button’s OnSelect property and replace it with this code. A file must be passed as an object to Power Automate. The contentBytes field holds a reference to the attachment file and name stores the filename and extension.
UploadFileToDocumentLibrary.Run(
     {
         contentBytes: First(att_SubmitContract_AttachFile.Attachments).Value,
         name: First(att_SubmitContract_AttachFile.Attachments).Name
     }
 );
Note: if you are receiving an error when passing the file to the flow make sure you have set the flow input to be a required field.
We’re done creating the ‘upload a document to a SharePoint library’ functionality. Test your app to make sure its working.
The contract document should appear in your SharePoint site as shown below.
Upload Multiple Files To A SharePoint Document Library (Optional)
If we wanted to include the ability to upload multiple files at the same time we could change the OnSelect property of the upload button to loop through each attachment and run the flow once per file. We will also need to increase the MaxAttachments property of the attachment control from 1 to another value.
ForAll(
    att_DocLib_SubmitContract.Attachments As Document,
    UploadFileToDocumentLibrary.Run(
        {
            contentBytes: Document.Value,
            name: Document.Name
        }
    )
);
Since this is an optional step, the rest of this article will assume you have used the single-file upload method.
Add Metadata To A SharePoint Document Library
The salesperson must also include additional data about the contract to keep the contracts files organized. The technical term for this is metadata: “data-about-data”. But most folks simply call it tagging documents.
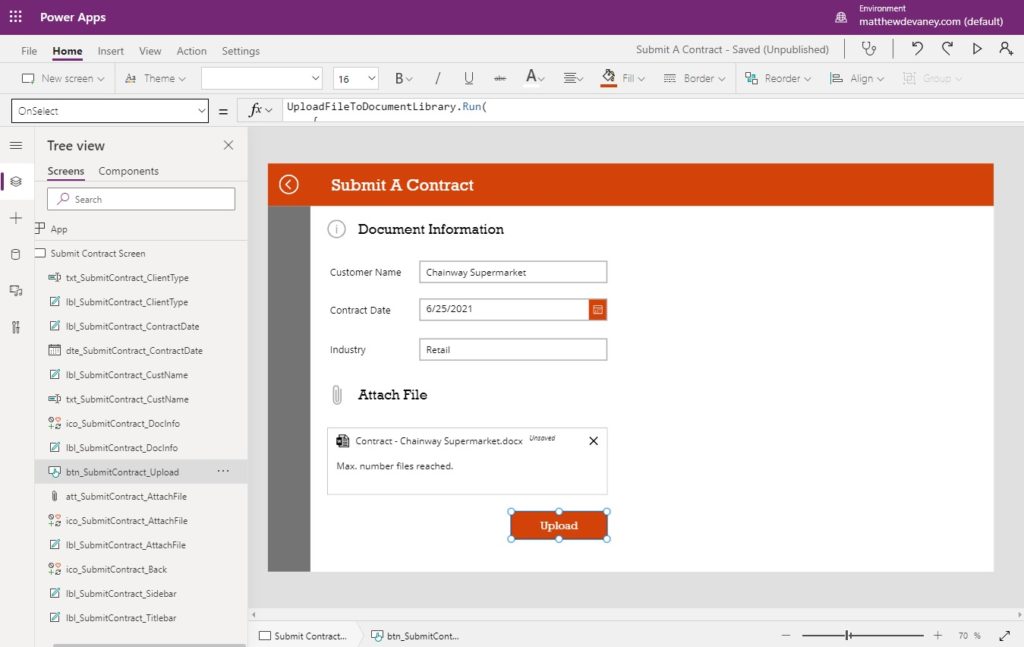
Add a few text inputs (Customer Name, Industry) and a date picker (Contract Date) as shown below to capture the metadata.

We must update the Upload Document To A SharePoint Library flow to insert the metadata from Power Apps. Modify the Power Apps (V2) trigger action to add 3 new inputs as shown below. They should all be required inputs.

Then add another action at the bottom of the flow: SharePoint – Update file properties
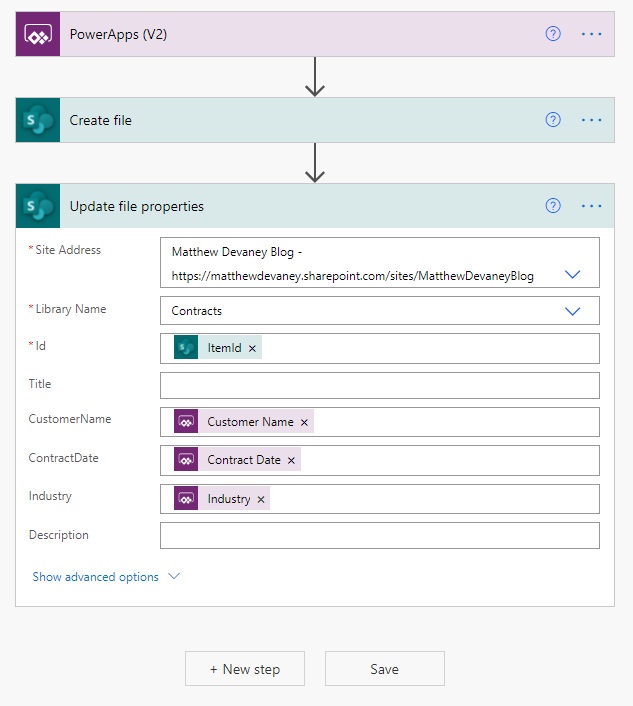
Now we are done updating the Flow. Go back to Power Apps…
…and update the OnSelect property of the upload button with this additional code to pass the new parameters. Notice that the parameter names do not match the names we defined in flow. They are generic names based on the data type.
UploadFileToDocumentLibrary.Run(
     {
         contentBytes: First(att_SubmitContract_AttachFile.Attachments).Value,
         name: First(att_SubmitContract_AttachFile.Attachments).Name
     },
     txt_SubmitContract_CustName.Text,
     Text(
         dte_SubmitContract_ContractDate.SelectedDate,
         "[$-en-US]yyyy-mm-dd"
     ),
     txt_SubmitContract_ClientType.Text
 );
We can now include metadata with the document at the time of upload to SharePoint. Give this new functionality a test and check SharePoint to make sure the data was successfully written.
Display Recently Uploaded Files
A salesperson might want to see a list of the most recently uploaded files. To add this feature, connect the app to the Contract document library in SharePoint.
Then add a gallery to the Submit A Contract app that looks like the screenshot below.
Use this code in the Items property of the the gallery to show uploads from newest-to-oldest.
Sort('Contracts', Modified, Descending)
Put this code in the Text property of the name label…
ThisItem.Name
…and this code in the Text property of the date modified label.
ThisItem.Modified
That’s it, we’re done!
Comments