You can use Power Automate to an send email with a formatted and styled HTML table. With the help of the Create HTML Table action any set of SharePoint list items can be quickly converted into an HTML table. But that table will look pretty plain unless you apply some CSS to it. In this article I will show you my foolproof Power Automate method for HTML table styling.
Table of Contents
• Introduction: The Daily Cash Receipts Report
• Setup The SharePoint List
• Create An HTML Table From SharePoint List Items
• Design And Apply An HTML Table Style
• Send An Email With An HTML Table Style
• Formatting Dates And Numbers In An HTML Table
Introduction: The Daily Cash Receipts Report
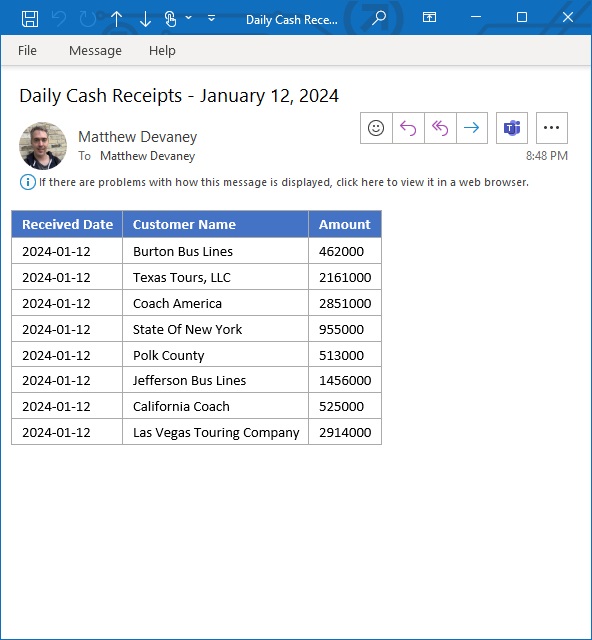
Salespeople at a bus manufacturing company receives a daily cash receipts report from the accounting team. The email contains a formatted HTML table showing when payment was received, which customer paid and the amount.

Setup The SharePoint List
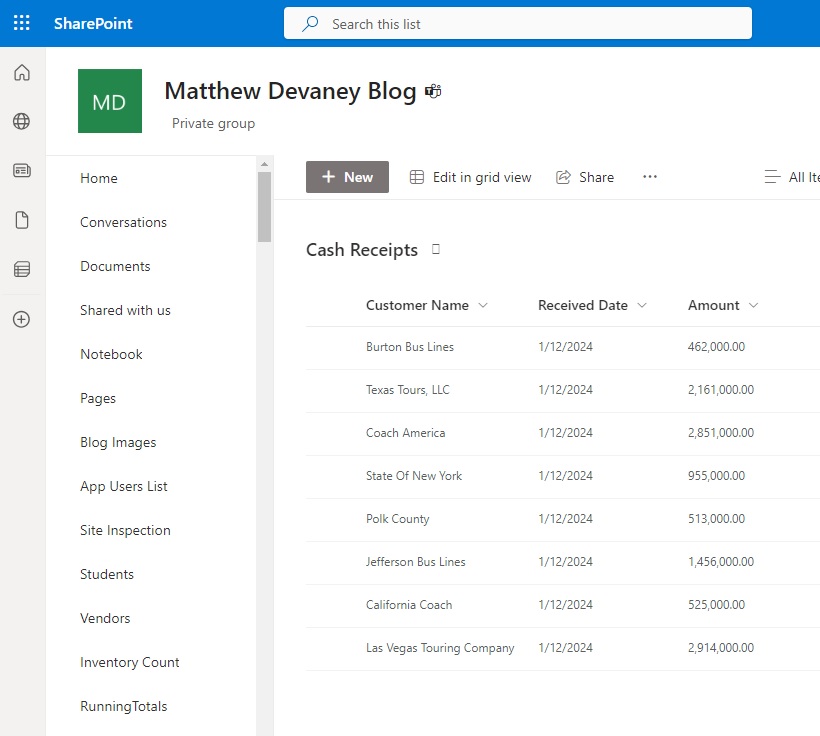
Create a new SharePoint list named Cash Receipts with the following columns:
- Customer Name (text)
- Received Date (date only)
- Amount (number)
Populate the SharePoint list with the following data:
| Customer Name | Received Date | Amount |
| Burton Bus Lines | 1/12/2024 | 462000 |
| Texas Tours, LLC | 1/12/2024 | 2161000 |
| Coach America | 1/12/2024 | 2851000 |
| State Of New York | 1/12/2024 | 955000 |
| Polk County | 1/12/2024 | 513000 |
| Jefferson Bus Lines | 1/12/2024 | 1456000 |
| California Coach | 1/12/2024 | 525000 |
| Las Vegas Touring Company | 1/12/2024 | 2914000 |
After setting up the SharePoint list it will look like this.
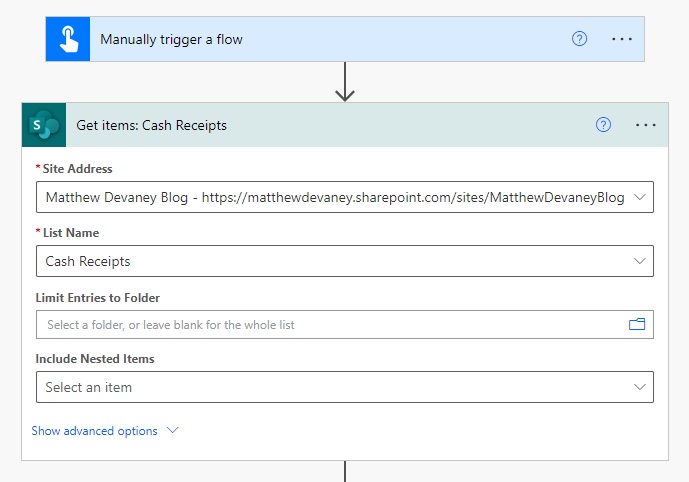
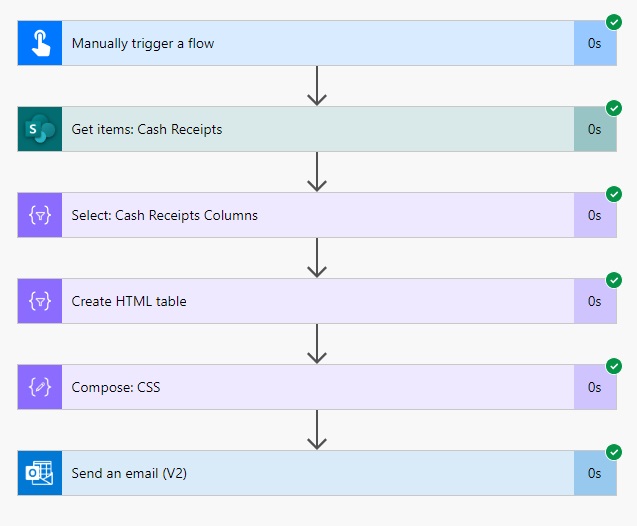
Create An HTML Table From SharePoint List Items
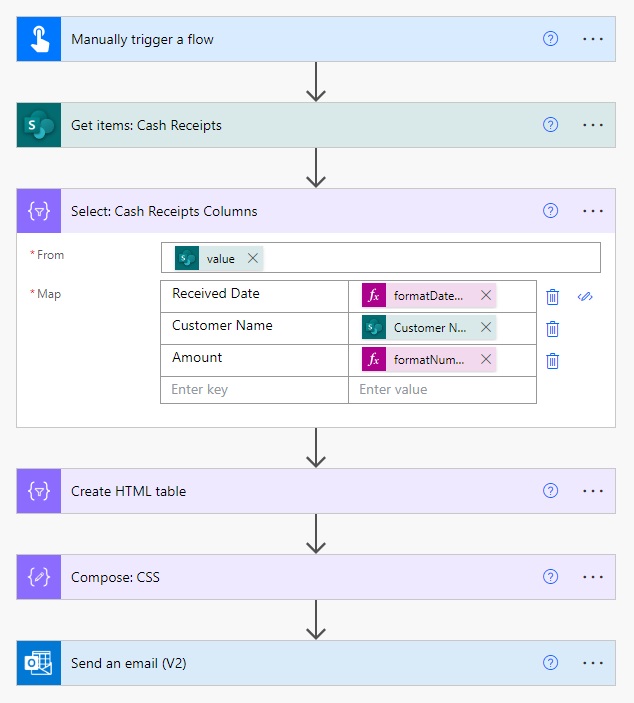
We want to get all of the items in the Cash Receipts SharePoint list and convert them into an HTML table. Open Power Automate and create a new flow with an instant trigger. Then add the SharePoint – Get Items action and select the Cash Receipts list.
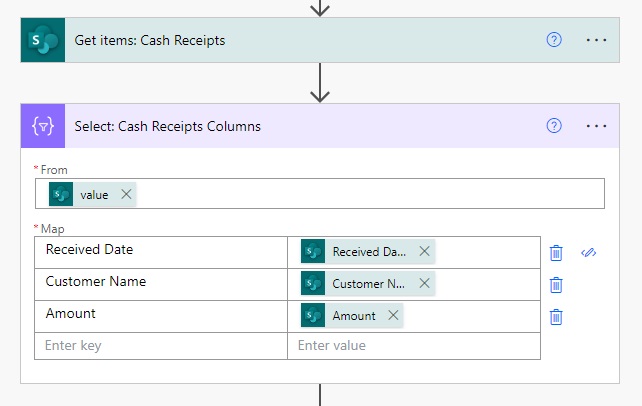
The SharePoint list includes many columns that we do not want to appear in the email. We only want to show the Received Date, Customer Name and Amount. To show only the desired columns insert the Data Operations – Select action and configure it as shown below.
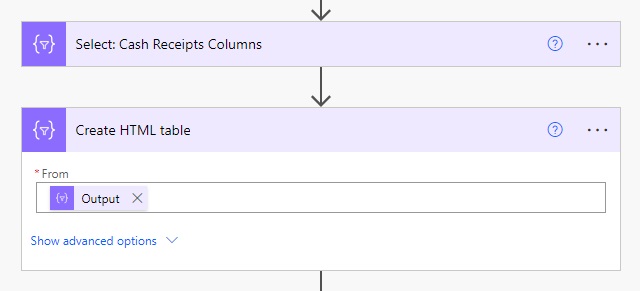
Then add a Data Operations – Create HTML table and use the output of the Select action in the from field. The flow now result in a plain HTML table with no styling applied.
Design And Apply An HTML Table Style
To create the HTML table style we will use the DivTable Table Styler online tool. Scroll down to the style editor and select the NO STYLE theme. Then setup the HTML table style exactly as shown below.

Below the Style Editor there is a WYSIWYG preview that shows a preview of what the table will look like. After the desired style has been achieved copy the copy in the CSS textbox to the clipboard.
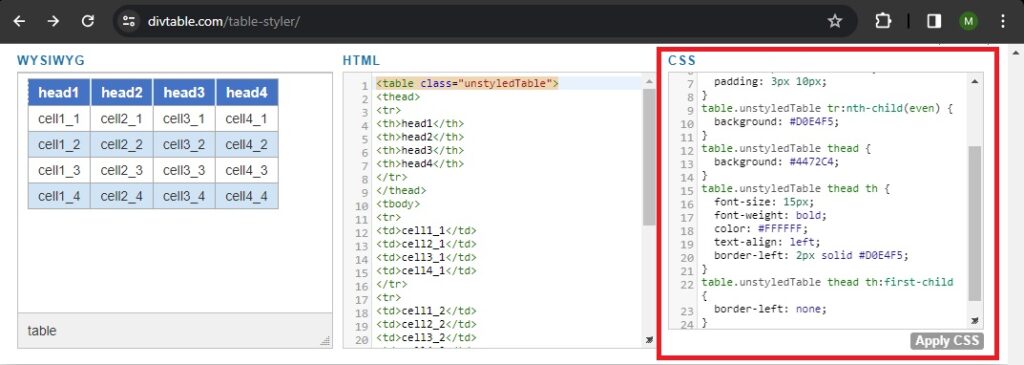
Paste the code into Windows Notepad and remove the “.unstyledTable” CSS class from it entirely. Then add style tags to the start and end of the code.
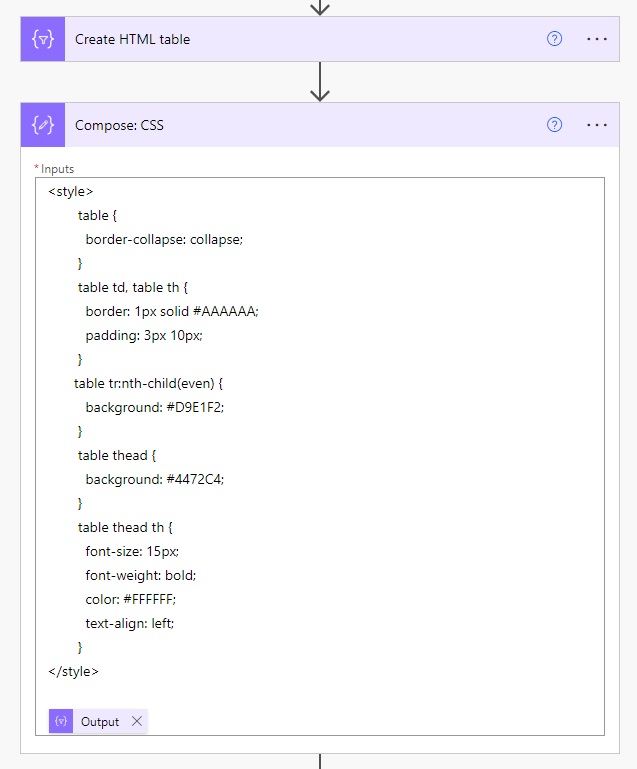
<style>
	table {
          border-collapse: collapse;
	}
        table td, table th {
          border: 1px solid #AAAAAA;
          padding: 3px 10px;
        }
       table tr:nth-child(even) {
          background: #D9E1F2;
	}
	table thead {
	  background: #4472C4;
	}
	table thead th {
	  font-size: 15px;
          font-weight: bold;
          color: #FFFFFF;
          text-align: left;
	}
	table tfoot {
 	 font-weight: bold;
	}
</style>
Insert a Data Operations – Compose action into the flow and copy + paste the code from Windows Notepad into it. Add the output of the Create HTML table action at the bottom. When placed in the body of an email this Compose actions output will display a styled HTML table.
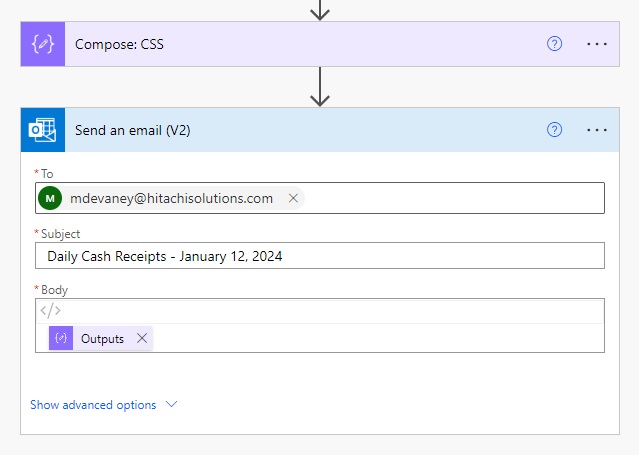
Send An Email With An HTML Table Style
Now we have everything needed to include in the email. Add an Office 365 Outlook – Send An Email (V2) action with “Daily Cash Receipts – January 12, 2024” as the subject. Switch the body to Code View and fill it with the Compose CSS action output.
Test run the flow.
When the email is received it will look like this.
Formatting Dates And Numbers In An HTML Table
The Received Date and Amount are shown using the default date & number formats respectively. We can change that with some additional updates to the flow.
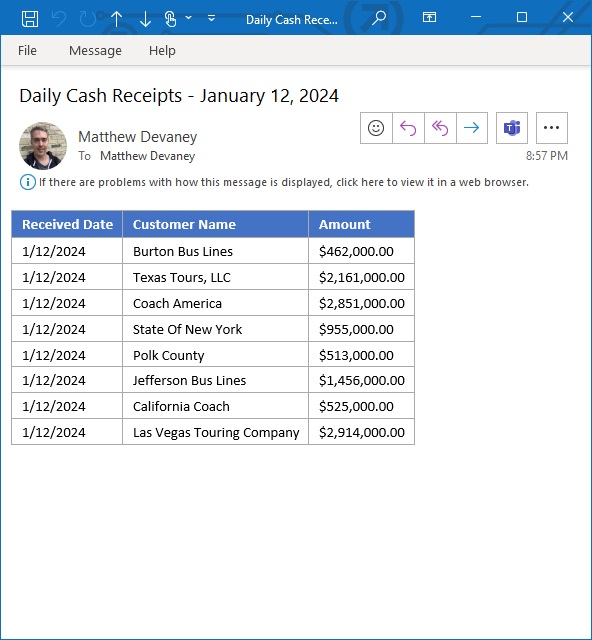
Go to the Select action of the flow and change the Received Date value to this code. The date showing as 2024-01-12 will now appear as 1/12/2024.
formatDateTime(item()?['ReceivedDate'], 'M/d/yyyy')
Then update the Amount code to this instead. The number showing as 462000 will now appear as $462,000.00
formatNumber(item()?['Amount'], '$#,##0.00')
Perform another flow test run to see the dates and numbers in their desired formats.
Comments