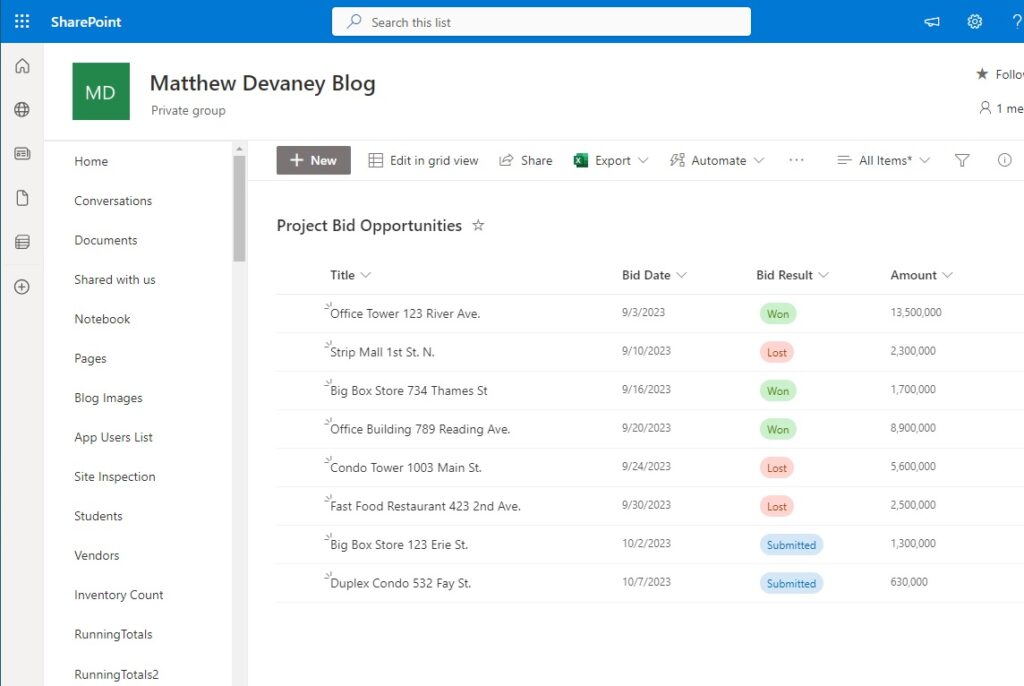
Setup The SharePoint List
Create a new SharePoint list named Project Bid Opportunities with the following columns and types:
- Title – single-line text
- Bid Date – date-only
- Bid Result – choice column (submitted, won, lost)
- Amount – number
Then populate the list with this data:
| Title | Bid Date | Bid Result | Amount |
| Office Tower 123 River Ave. | 9/3/2023 | Won | 13,500,000 |
| Strip Mall 1st St. N. | 9/10/2023 | Lost | 2,300,000 |
| Big Box Store 734 Thames St | 9/16/2023 | Won | 1,700,000 |
| Office Building 789 Reading Ave. | 9/20/2023 | Won | 8,900,000 |
| Condo Tower 1003 Main St. | 9/24/2023 | Lost | 5,600,000 |
| Fast Food Restaurant 423 2nd Ave. | 9/30/2023 | Lost | 2,500,000 |
| Big Box Store 123 Erie St. | 10/2/2023 | Submitted | 1,300,000 |
| Duplex Condo 532 Fay St. | 10/7/2023 | Submitted | 630,000 |
Once completed the Project Bid Opportunities SharePoint list will look like this.
Create An Array Of Values To Export To Excel
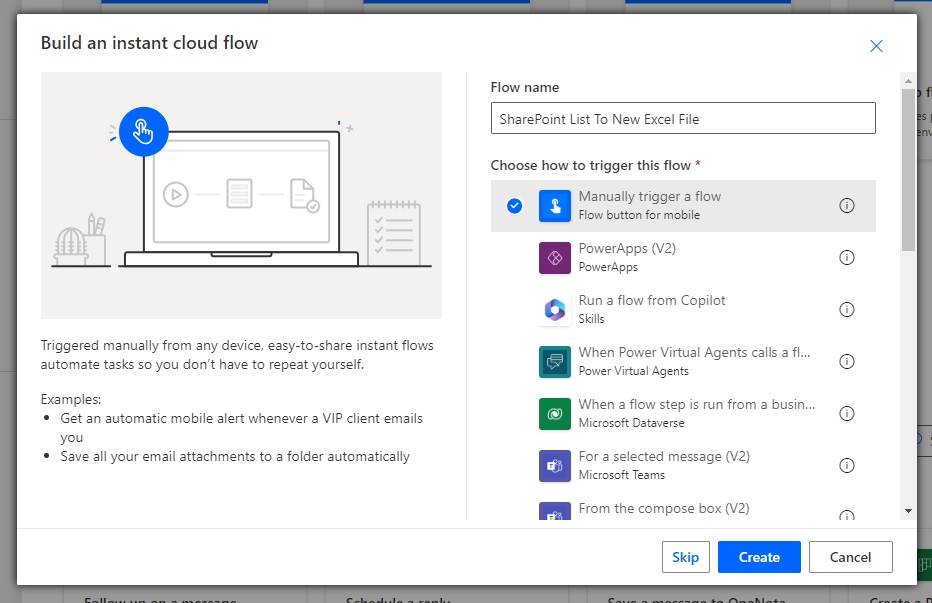
Our first goal is to get the list of items from SharePoint and build an array that can be exported into an Excel table. Create a new Power Automate flow named SharePoint List To New Excel file and use an instant trigger.
Make the first flow action SharePoint – Get Items. Point the action to the Project Bid Opportunities list.

Use the Data Operations – Select action to keep only 4 columns we want to include in the Excel file and drop the rest:
- Title
- Bid Date
- Bid Result
- Amount
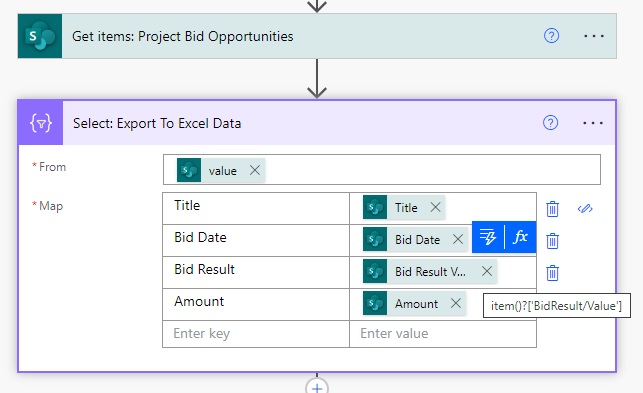
When the Select flow action is run it will generate the array below. Note that we must only use simple data types in our array such as text, number, date times and true/false values when exporting to Excel. A complex data type such as object or array will make this process fail.

Generate A Blank Excel File
A blank excel file must be created before we can begin to populate it with data. Start by assigning a filename with a Data Operations – Compose action.
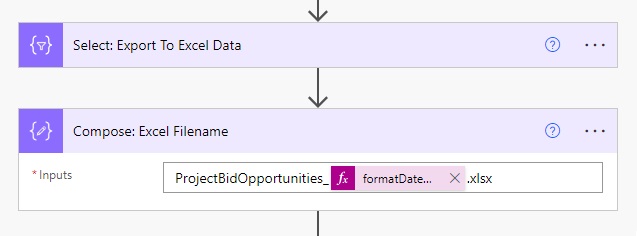
Use the formatDateTime function to ensure a unique filename is generated everytime. A non-unique filename can lead to failures when the flow attempts over overwrite a locked file.
formatDateTime(utcNow(),'yyyy-MM-dd_hhmmss')
For the next step we must know the location of the SharePoint document library the Excel file will created within. In this example we will use the Documents folder included with every SharePoint site.
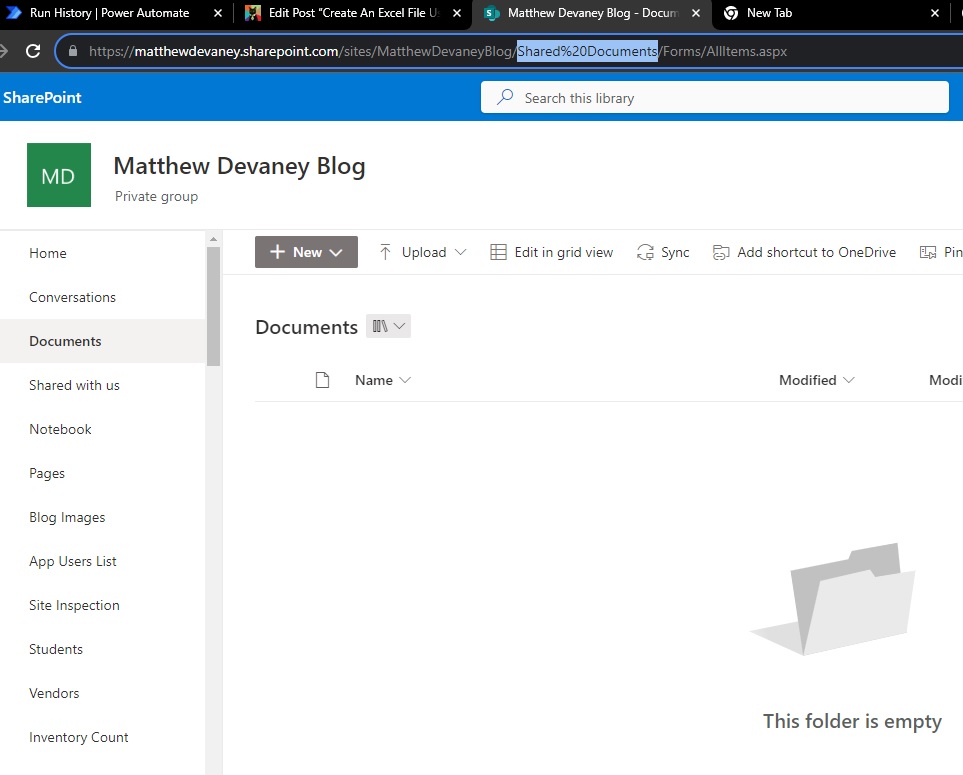
The path to the folder can be found in the document library URL as shown below.

To create a new Excel file we will use the SharePoint Rest API. Add the SharePoint – Send An HTTP Request action to the flow.
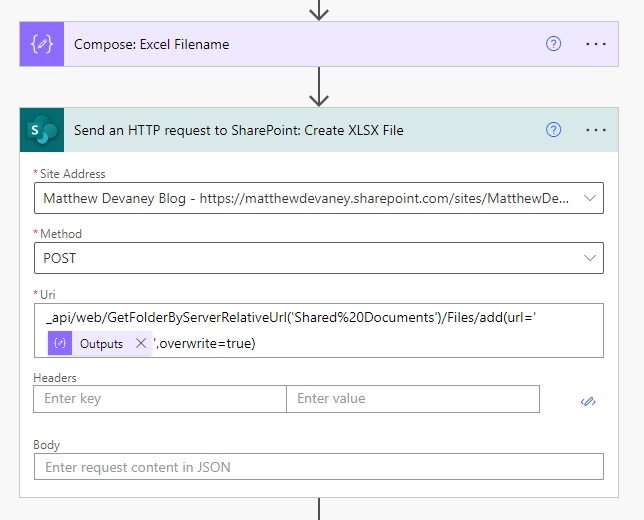
Add this API endpoint code to generate the blank Excel file inside the Documents library. Notice that the Documents library path is used inside the brackets for GetFolderByServerRelativeUrl.
_api/web/GetFolderByServerRelativeUrl('Shared%20Documents')/Files/add(url='@{outputs('Compose:_Excel_Filename')}',overwrite=true)
Insert A Table Into The Excel File
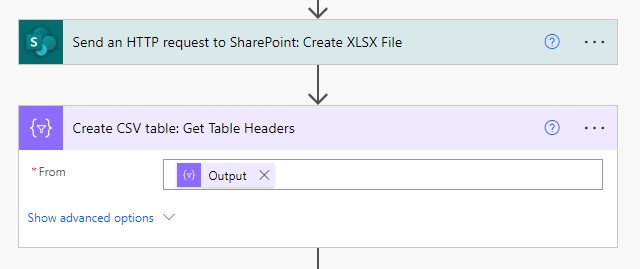
To write data into the Excel file requires a table. The first step is to determine the table column names. We will convert the output of the Select – Export To Excel Data action to a CSV table and extract the column names from the first row.
Add a Data Operations – Create CSV Table action to the flow.
Then insert an Excel – Create Table action. Point the action to the Documents Document Library. Then set the Table Range as A1 and the Table Name as tblProjectOpportunities.
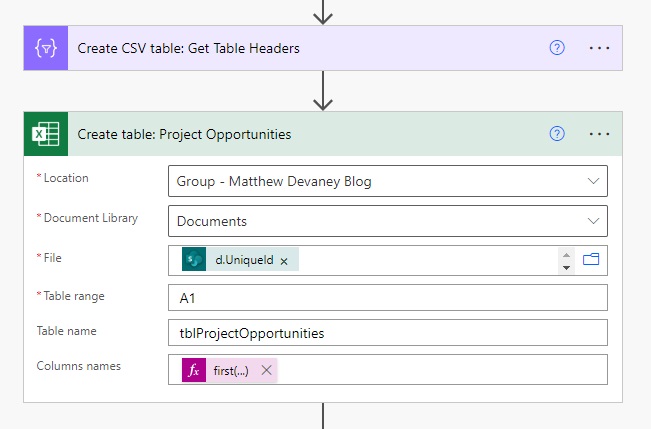
The File property of the action requires the unique identifier of the Excel file. We can get this from the SharePoint – Send an HTTP request to SharePoint action.
body('Send_an_HTTP_request_to_SharePoint:_Create_XLSX_File')['d']['UniqueId']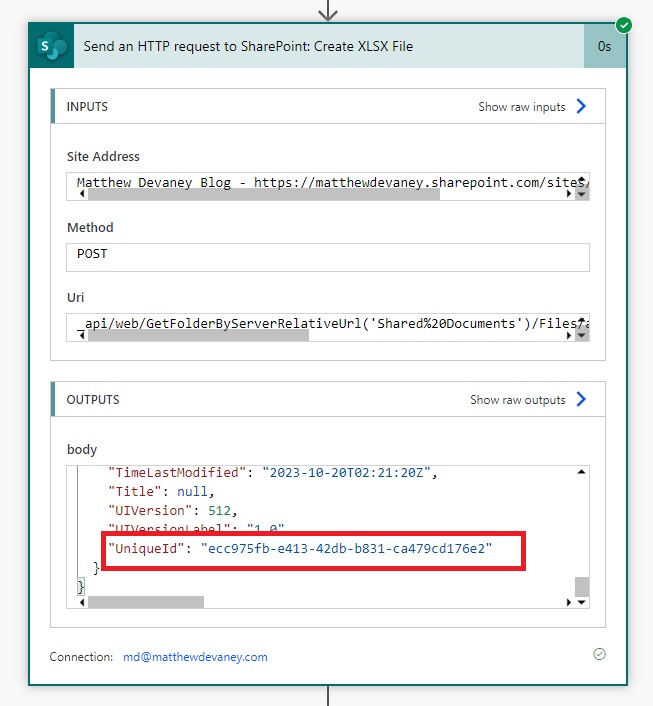
The column headers can be found in the first row of the Data Operations – Create CSV table action. Use this expression to split the CSV file by each new row and extract the first row. The new line character is represented by %0A in the decodeUriComponent function.
first(split(body('Create_CSV_table:_Get_Table_Headers'), decodeUriComponent('%0A')))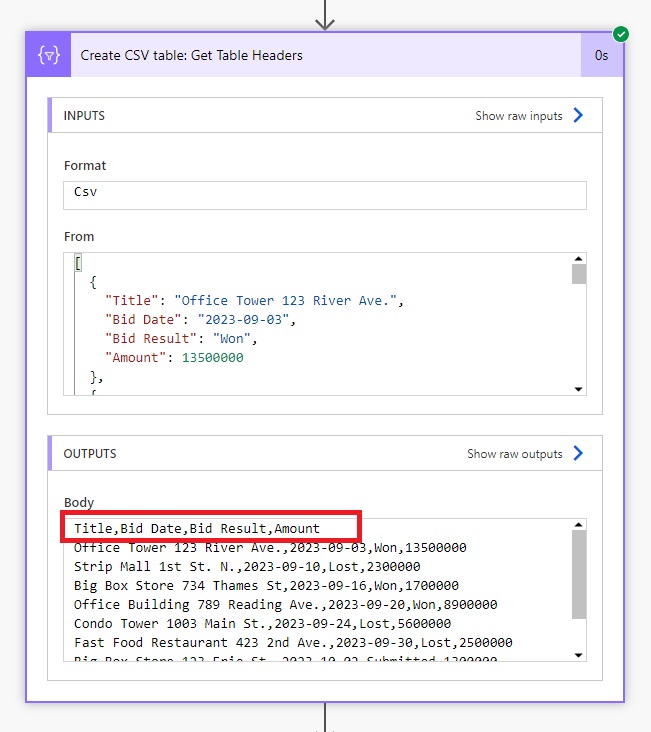
Add Rows To A Table In The Excel File
Now we can populate the Excel table with the items from our Project Bid Opportunities SharePoint list. Add a Control – Apply To Each action to the flow and place the Excel – Add A Row Into A Table action inside of it.
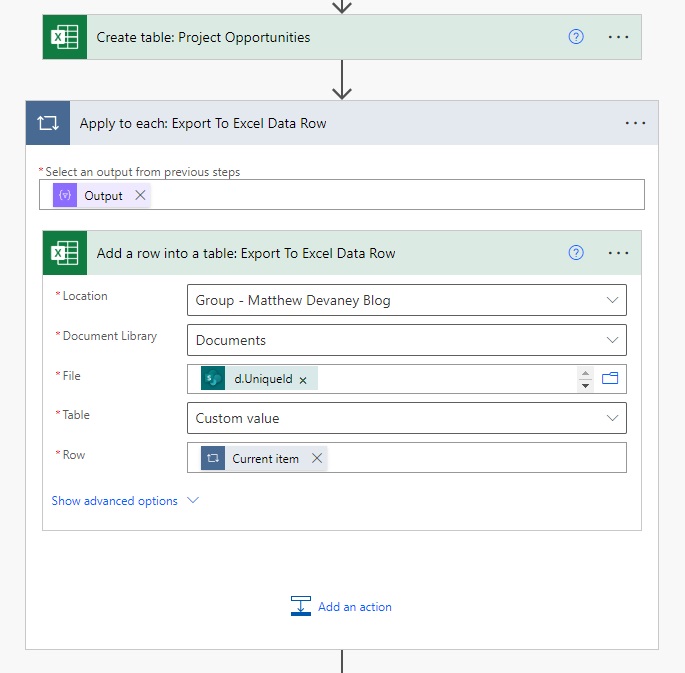
Use the output of the Select – Export To Excel Data action in the Apply To Each action.
body('Select:_Export_To_Excel_Data')
Then supply the File field with the unique identifier of the Excel file.
body('Send_an_HTTP_request_to_SharePoint:_Create_XLSX_File')['d']['UniqueId']
The Table custom value should use the name field from the Excel – Create Table action.

And finally define the Row as the Current Item of the Apply to Each loop.
Run The Flow To Create A New Excel File In The SharePoint Document Library
We are now finished building the flow. Run the flow to try it out.
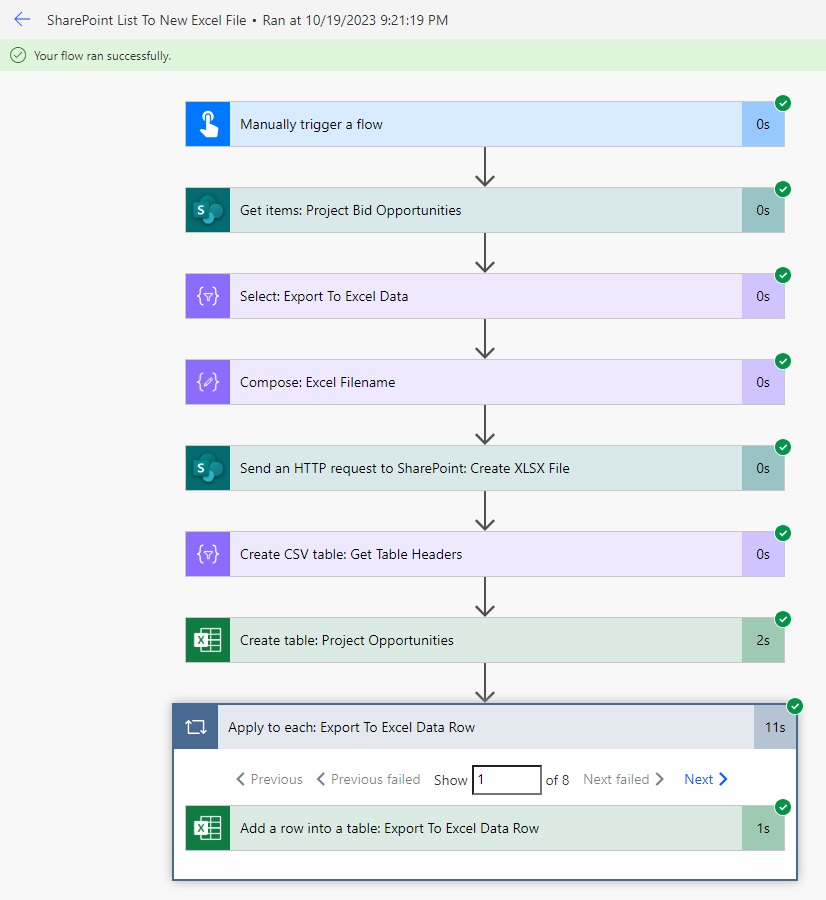
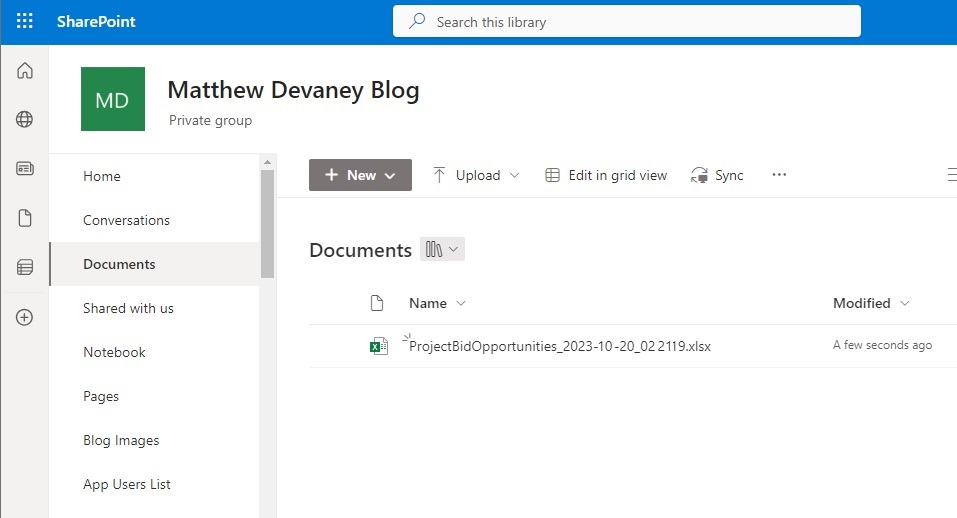
A new Excel file is created in the Documents SharePoint Document Library.
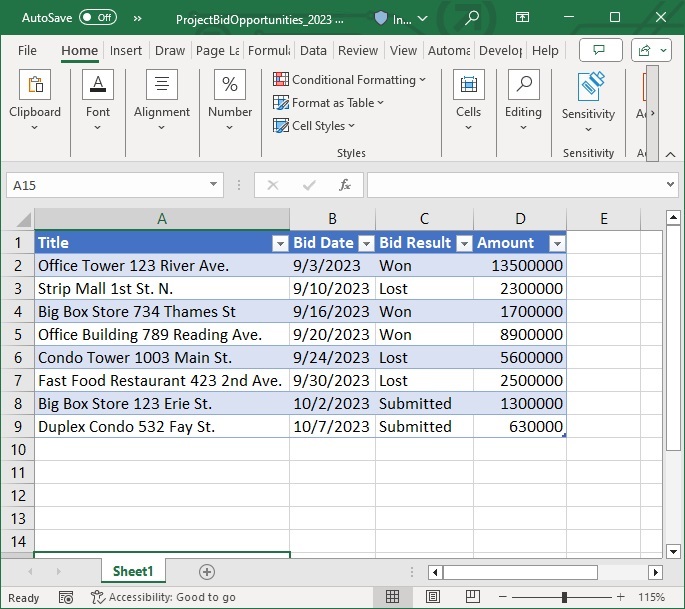
When we open the Excel file we can see the SharePoint list items are found in a table.
Comments